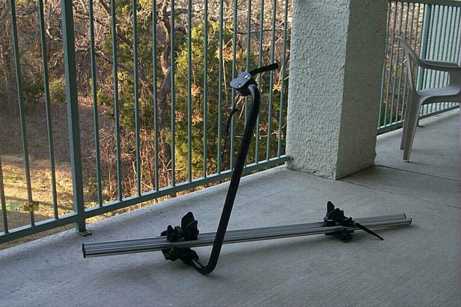
I wanted to provide more details about the bike rack and how it mounts. By the way, I've learned that the official name is the "Bike Topstar."
You can see that the bike rack consists of:
Rail
Mounting Plate with Wheel Shoe and Supporting Arm attached
Mounting Plate with nothing attached
Wheel Shoe, (independent of second mounting plate) that slides inside the rail to fit your bike's wheelbase.
Frame Holder on the top end of the Supporting arm.
The Supporting Arm has a radius of 25" and the center of rotation is 1.5" below the bottom of where the tire reaches.
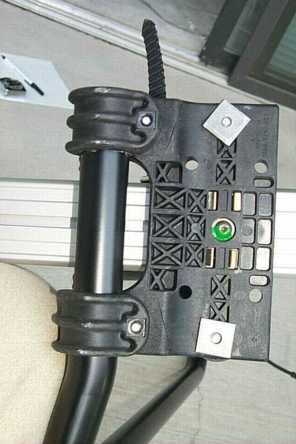
Above is a picture that shows the bottom of the mounting plate with the base of the supporting arm. The other plate is similar. You can see the two sliders. They are about 3/4" square and are just shy of 5" apart. Note that there are four more holes that could be used on some other type of mount. Their centers make a rectangle of 3"x1 5/8".
I really hate these square sliders. They should be round, or slightly less desirably, they should be longer with rounded edges so they slide into the rail easier. It is very annoying to try to slide these onto the rail while they tend to rotate and get jammed. What was that reputation for German engineering? (Just kidding!)
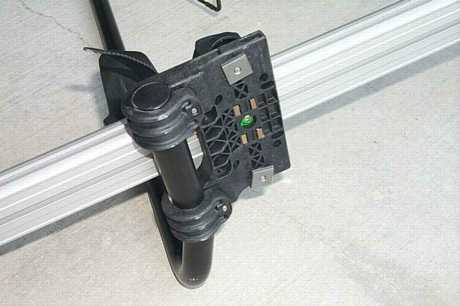
Another perspective of the mounting plate.
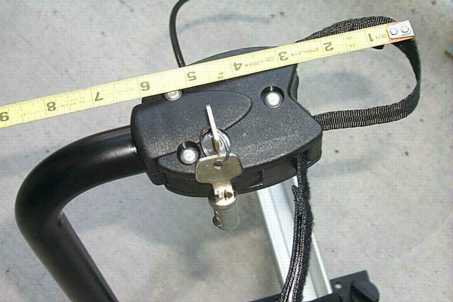
Here's a close-up of the frame holder. It locks in a fairly clever way, and you can see my spare key dangling from the key that is inserted. I put the tape measurer up so you can see the amount of webbing available to wrap around the frame. Very big frames (like a cannondale) will probably have problems, but you can replace the webbing with a longer strap. Note that you need some slack in the web to be able to hook it up.
It is trivial to put a longer web strap in the frame holder. You need to sew up one end to a hook, and the other end you sew up after it is installed. Anyone with a sewing machine should be able to handle it.
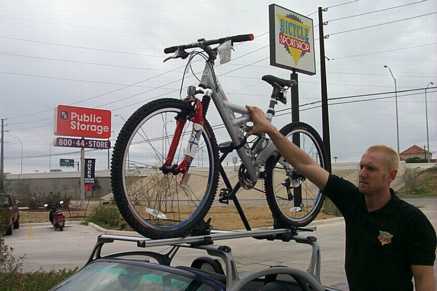
Here's a picture of the bike rack with a Trek VRX300 onboard. The frame holder will reach the downtube fine, but the web strap definitely needs to be lengthened. The bike shop dude was very kind to hold this up while I took the picture.
1. RTS Installation - Starting Off
2. RTS Installation - A Pillars
3. RTS Installation - B Pillars
4. RTS Installation - Installing Arches and Finishing Up
6. Bike Rack Details
If you note any errors or omissions, please let me know.
Back to RTS Installation
Back to Skyler's Home Page